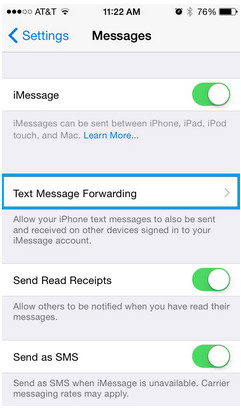
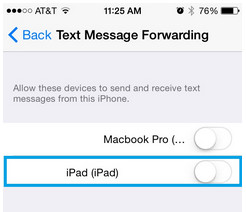
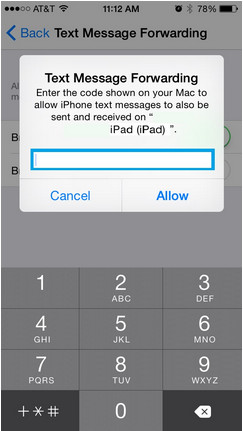
The Apple Watch is, first and foremost, an iPhone accessory. It might be even more than that eventually, a truly independent gadget, but a vast majority of its current core functions — making calls, sending messages, getting information, even playing any third-party games — require your iPhone to be on, have Internet service, and be paired with the Watch via Bluetooth or a shared Wi-Fi network. If you’re thinking about getting one, make sure you know that. It requires an iPhone 5 or later, and it can’t even be set up without one.
Still, the Apple Watch can do a few things without your iPhone around — more than I even realized. I left my iPhone behind and went for a stroll with just the Apple Watch to try it out.
Here’s everything the Apple Watch can do when away from your iPhone:
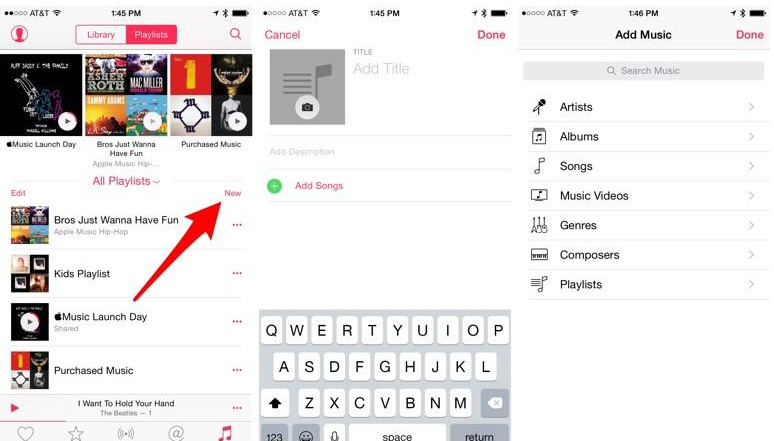
Music
![apple watch music]()
The Apple Watch has 6.2GB of available storage, of which 2GB can be used to store music. You sync music with Apple Watch via your iPhone and the Apple Watch app, no Mac or iTunes required (but, the music must be on your phone in the Music app, or in iTunes in the Cloud). Once your music is synced, you’re free to listen as long you have a pair of Bluetooth headphones. I paired a few sets easily via the Apple Watch’s Bluetooth settings: the ones I tested in the video above were the Plantronics BackBeat Fit, a highly-rated comfy pair of fitness-targeted wraparound wireless sport earbuds. In the Apple Watch Music app, you need to Force Press and select “Source” as Apple Watch. Once that awkward step is done, music plays just like on an iPod.
Fitness
Apple has two built-in fitness apps called Activity and Workout, and both work away from the iPhone. You can measure heart rate, too. Activity tracks steps, time spent standing, and active exercise. Workout allows timed exercise sessions that measure pace, distance, heart rate, and calorie burn estimates for various activities. The only thing you can’t do away from your iPhone is track your walk or run with GPS: that requires your iPhone. Third-party fitness apps can’t be used away from your iPhone, either. In fact, all third-party apps — those not created by Apple — need an iPhone connection to work.
Apple Pay
Once you set up a credit card for Apple Pay to work on Apple Watch, it keeps working even when your iPhone is not attached. Double-click the flat side button, and you can tap to pay at any Apple Pay-ready store. It’s easy to use and addictive. If the watch is taken off your wrist, you’ll need to enter a passcode to use it again. Because Apple Pay doesn’t use your actual credit card number, you can cancel it from your iPhone and deactivate your Apple Watch’s Apple Pay function, even if the watch isn’t online at all.
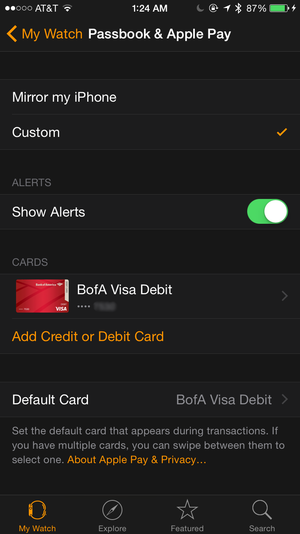
Passbook
![apple watch passport]()
You can store boarding passes, tickets and gift cards in Passbook in the form of QR codes, and it’s a great alternative to Apple Pay for a lot of stores and services. It’s easy to open your cards and tickets, and QR codes even get brighter when you display them, for easy scanning.
Photos
![apple watch photo]()
There’s a small photo album app on the Apple Watch that stores up to 500 photos from your phone library or iCloud. It’s hard to see pics on the small screen, but it’s a cute replacement for the itty-bitty wallet photo.
Alarms, timers, world clock, stopwatch…and watch faces
Apple has several timer and clock apps apart from the stylized watch faces, which also work when your iPhone is disconnected and offline. You can use Apple Watch like a full-featured chronograph and watch, or as an alarm clock. And of course, you can use Apple’s own beautiful watch faces, too, which will still tell time.
Reading messages, recent calls and even offline voice mails
![apple watch message]()
You can’t make phone calls away from your phone, but you can see who’s called recently, and read already-sent texts. Shockingly, you can even listen to voice mails! The Apple Watch syncs visual voice mail, and most of them will play back on my watch even with Airplane mode turned on. You won’t be able to receive new messages without connecting your phone again, but at least you can browse missed connections.
That’s it for now
Hopefully, someday, the Apple Watch will use its Wi-Fi antenna to get data on its own, or to pair with other devices like the Apple TV and Macs (it already has an Apple TV remote mode, but it’s somewhat simple in its range of function).
Source: CNET
You might be interested:
You can follow Syncios on Twitter, Facebook for more tips and tricks.
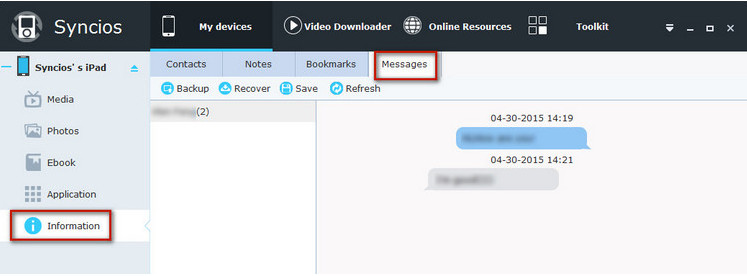
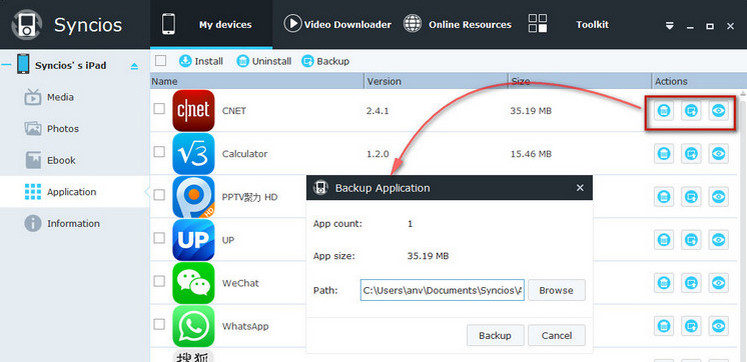
Recommend: if you would like to backup your iPhone/iPad/iPod Touch data to the PC, just go here to learn more. Simply download the free version and have a try, it can transfer data between iOS device and PC freely and easily.
![Download free syncios]()